Managing your carrier configurations securely in techSHIP is essential for accurate shipping operations. Inactivating a baseline account allows you to safely lock its configuration and halt its linked operations without losing historical data, while activating it restores full functionality.
This guide covers the business rules and procedural steps to inactivate and activate a Carrier Baseline Account.
TABLE OF CONTENTS
- Understanding Baseline Account Statuses
- Accessing the Baseline Accounts List
- How to Inactivate a Baseline Account
- How to Activate a Baseline Account
Understanding Baseline Account Statuses
Before modifying your account statuses, it is crucial to understand the business logic regarding Active and Inactive states.
 | Inactive accounts prevent all clients from using their associated (billing) accounts. Use with caution. | |
| | ||
- Visibility:
By default, the Baseline Accounts list only displays Active accounts. To view Inactive accounts, you must use the Advanced Filters.
- Lifecycle Restrictions:
When an account is marked as Inactive, the system completely hides the Copy, Migrate, and Delete actions to protect the historical configuration.
- Edit Restrictions:
Opening an Inactive account locks all configuration fields into a read-only state. The only permitted action is changing the Status drop-down back to Active for reactivation.
Accessing the Baseline Accounts List
To modify a baseline account status, you must first navigate to the specific carrier configuration in techSHIP.
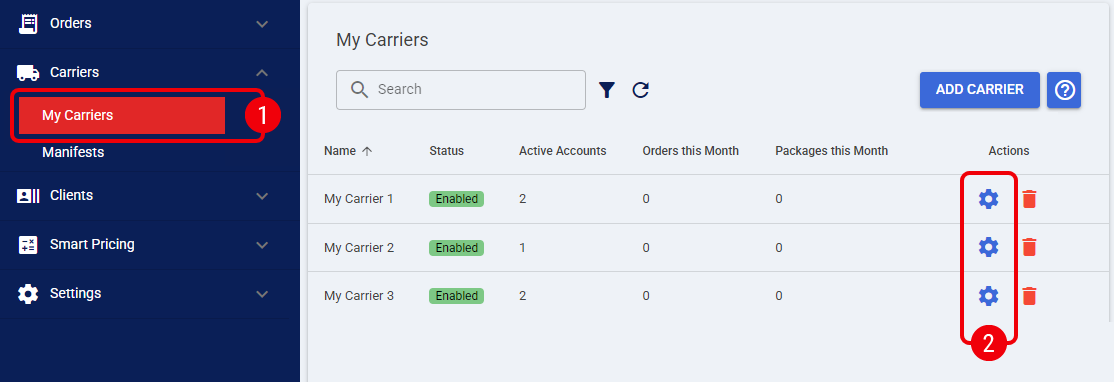
 | Access the main menu and click My Carriers under the Carriers category. |
 | Locate the specific carrier you want to manage and click the Settings icon in its corresponding row. |
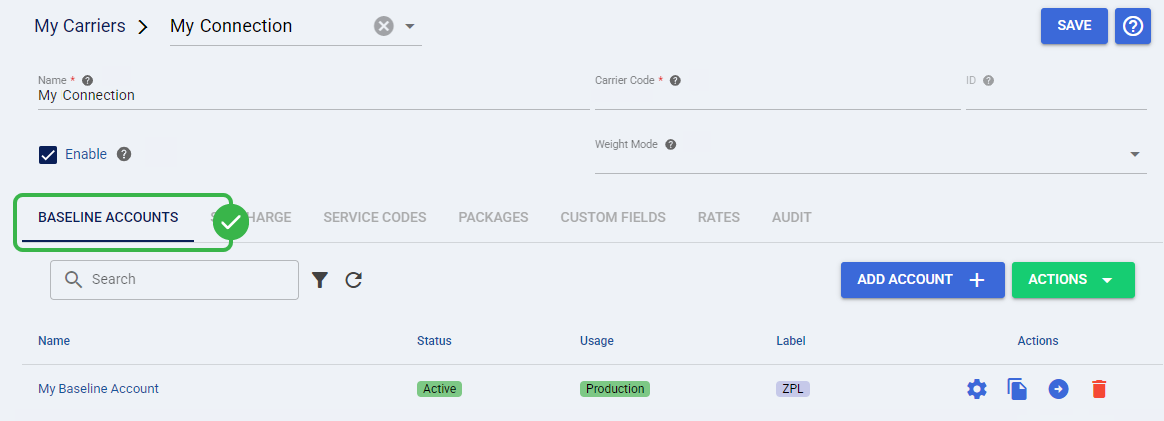
Locate the Baseline Accounts tab to review your currently available configurations.
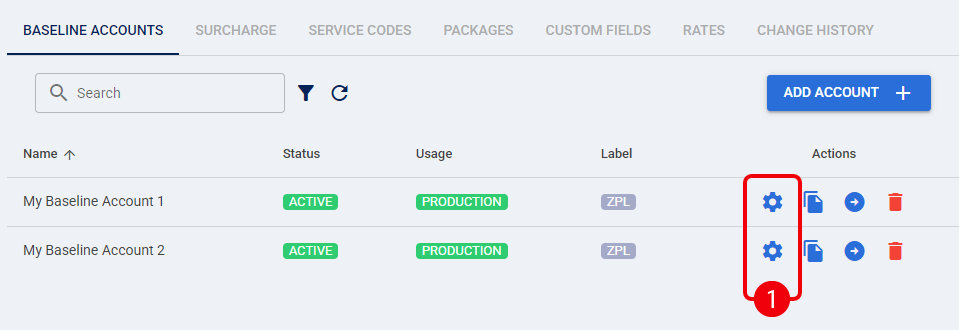
 | Upon loading the Baseline Accounts tab, the grid strictly filters for Active accounts. To locate disabled accounts, you must click Advanced Filters and adjust the three-state Active toggle to either Inactive or All. | |
| | ||
How to Inactivate a Baseline Account
| On the Baseline Accounts tab, locate the Active account you want to restrict and click the Edit icon in its corresponding row. |
| Locate the Status drop-down field and change the value from Active to Inactive. |
 | Click the Save button located at the top right of the screen. |
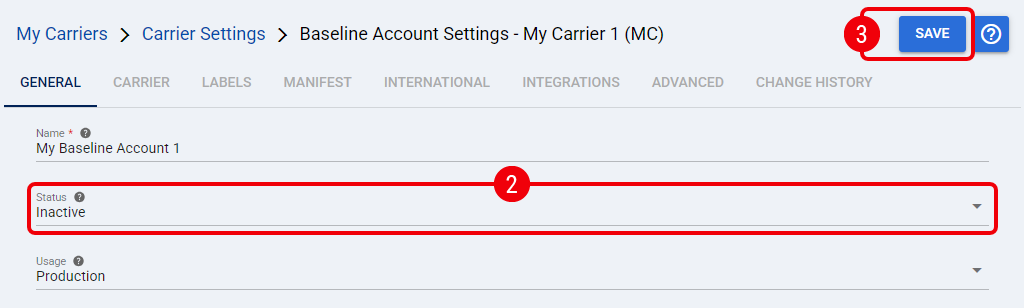
The account status changes to Inactive, hiding it from the default list view and locking its configuration fields from further edits.
How to Activate a Baseline Account
| On the Baseline Accounts tab, click the Advanced Filters icon. |
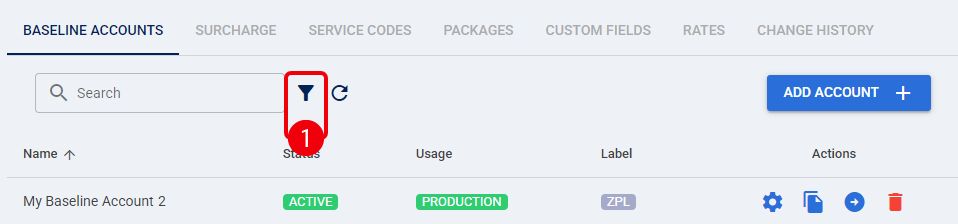
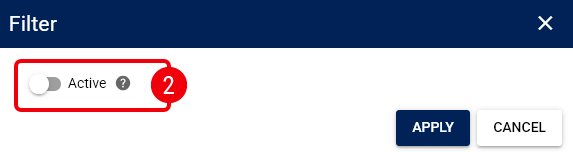
| Move the Active toggle to Inactive or All, and click Apply to reveal disabled accounts. |
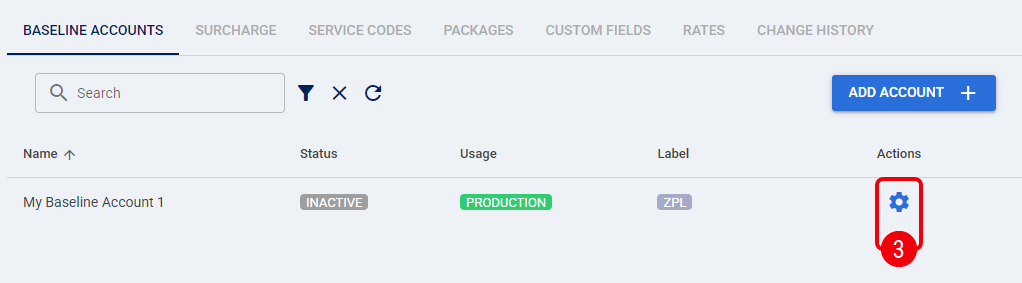
| Locate your specific Inactive account and click the Edit icon. |
 | In the restricted edit view, change the Status drop-down from Inactive back to Active. |
 | Click the Save button located at the top right of the screen. |
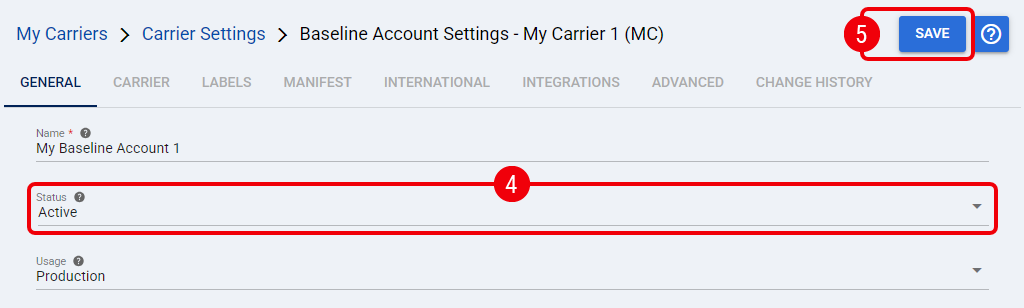
The account status changes to Active, and the system immediately restores full edit access and functionality.
Was this article helpful?
That’s Great!
Thank you for your feedback
Sorry! We couldn't be helpful
Thank you for your feedback
Feedback sent
We appreciate your effort and will try to fix the article