
When setting up a Midland Carrier account, you will have to:
 NOTE: This article describes how to set up the Carrier baseline account.
If the Carrier baseline account has already been set up and you intend to add a new Billing Account, refer to: How to add and set up a Midland Billing Account [Step-by-Step guide]
CARRIER SECTION
1. Access Maintenance and select Carriers
2. Click the Carrier for which you'll add the account to from the list
3. Click the Accounts tab
4. Click Add Account

5. In General Options set:
- Name: Midland
- Usage mode: Production
- Status: Active
- Label mode: PDF, PNG, or ZPL.
ZPL mode is available only for these courier services:
- Courier Ground
- Courier Air
- Courier Speed Letter
- Courier Deferred Air. - SCAC: Carrier/SCAC code you're using in the WMS

NOTE: If you need to work with both Courier and LTL services, make sure to create two baseline accounts, one for each. Label mode ZPL is supported for Courier Ground, Courier Air, Courier Speed Letter, or Courier Deferred Air. Use PDF, PNG for the LTL Baseline account.6. In Carrier tab set:
- API Key: API Key as provided by Midland
- Sender ID: Sender ID String, typically an address with a code, as indicated by Midland
- Carrier ID: Select the shipment type you need. For LTL shipments, select Midland LTL.
- PickUp API Key: Enter the standalone Pickup API Key provided by Midland for pickup requests.
- Weekends Mode: Select how weekend days should be handled.
- Pickup close time: Set the latest pickup time to use for pickup requests.
- Default pickup instructions: Enter the pickup instructions to send with the pickup request, if needed.
- Sender address info: Complete the sender and pickup address information:
- Sender name
- Sender company
- Address 1
- Address 2 (if applicable)
- City
- State/province
- Zip
- Country
- Contact Name
- Contact Phone
NOTE: For Midland LTL shipments, techSHIP automatically sends a pickup request to Midland when the manifest is finalized. Pickup requests are submitted once per manifest finalization flow, not after each individual order is processed. Pickup cancellation is not supported through this integration.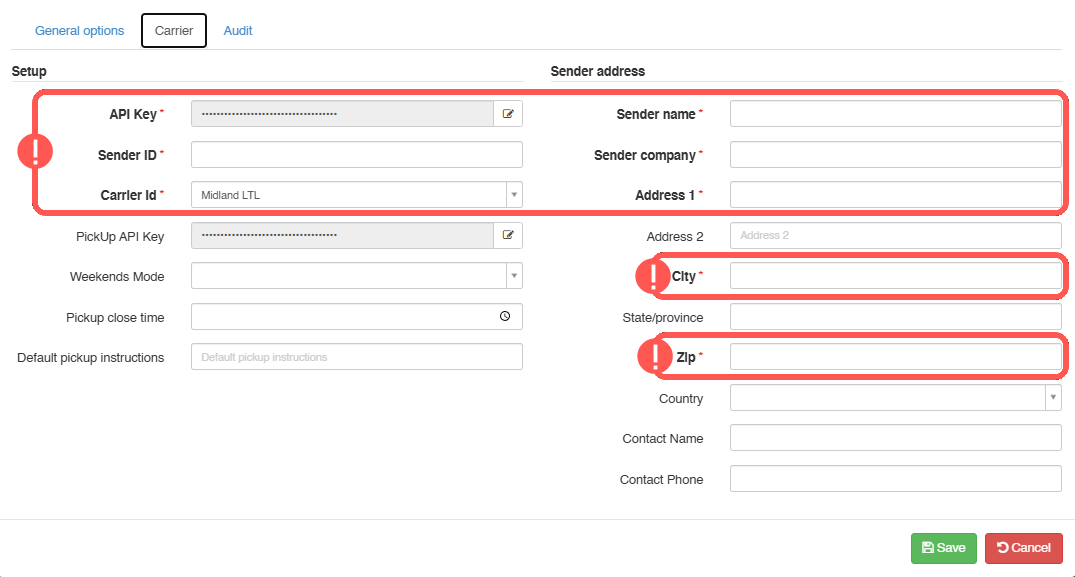

Once ready, proceed to setting up the Billing Account as described in:
How to add and set up a Midland Billing Account [Step-by-Step guide]
Was this article helpful?
That’s Great!
Thank you for your feedback
Sorry! We couldn't be helpful
Thank you for your feedback
Feedback sent
We appreciate your effort and will try to fix the article