
When setting up a UniUni Carrier account, you will have to:
 NOTE: This article describes how to set up the Carrier baseline account.
 If the Carrier baseline account has already been set up and you intend to add a new Billing Account, refer to: How to add and set up a UniUni Billing Account [Step-by-Step guide]
CARRIER SECTION
1. Access Maintenance and select Carriers
2. Click the Carrier for which you'll add the account to from the list
3. Click the Accounts tab
4. Click Add Account

5. In General Options set:
- Name -> UniUni
- Usage mode -> Production
- Status -> Active
- Label mode -> ZPL/PDF
- SCAC -> Carrier/SCAC code you're using in the WMS

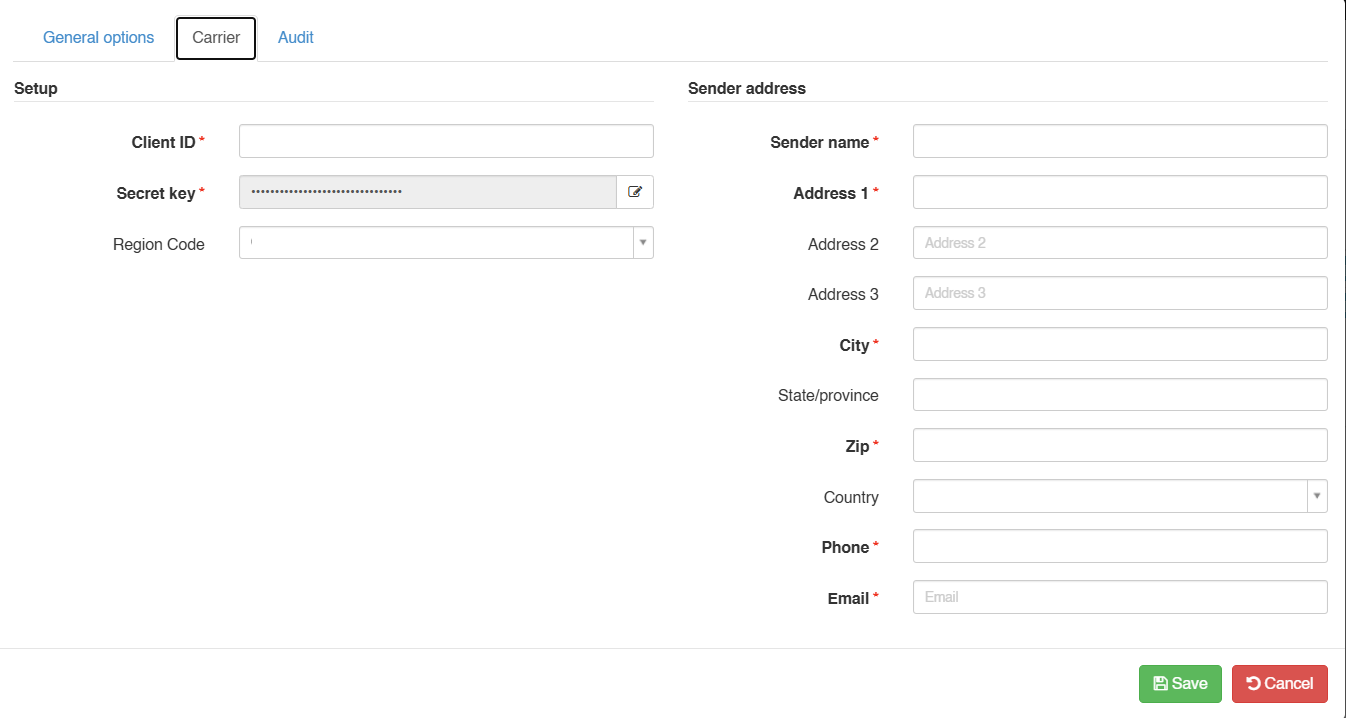
6. In the Carrier tab, set the following and Save:
- Client ID -> UniUni Client ID
- Secret key -> UniUni API Secret Key
- Region Code -> Select the region associated with the UniUni account, when applicable
- Sender address info -> Complete the warehouse induction address. Phone and Email are required.

Once ready, proceed to setting up the Billing Account as described in: How to add and set up a UniUni Billing Account [Step-by-Step guide]
Was this article helpful?
That’s Great!
Thank you for your feedback
Sorry! We couldn't be helpful
Thank you for your feedback
Feedback sent
We appreciate your effort and will try to fix the article