You can use Zones & Areas in techSHIP to map geographic regions to shipping transit zones.
This guide covers creating and maintaining these shared configurations for Custom Pricing Tables and Markup Profiles.
 | Use with Markup Profiles: You can configure Zones & Areas for use with Markup Profiles without creating a Custom Pricing Table. For detailed conceptual information and advanced configuration, refer to Understanding Markup Profiles in techSHIP [Guide]. | |
| | ||
TABLE OF CONTENTS
Configure Zones & Areas
| You can skip manual Zones & Areas configuration for supported Carriers by selecting predefined [SYSTEM] mappings in the Zone & Area field when creating a Service Level within a Custom Pricing Table or configuring a Service Group within a Markup Profile. In the screenshot below, you can see the Custom Pricing Table example.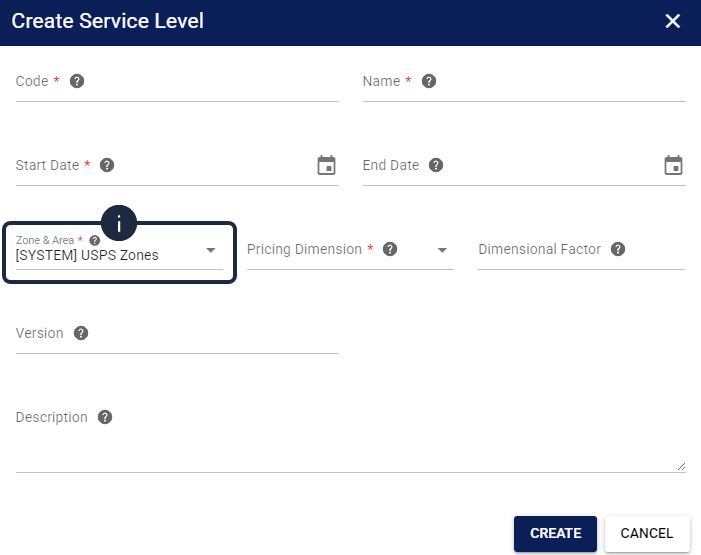 | |
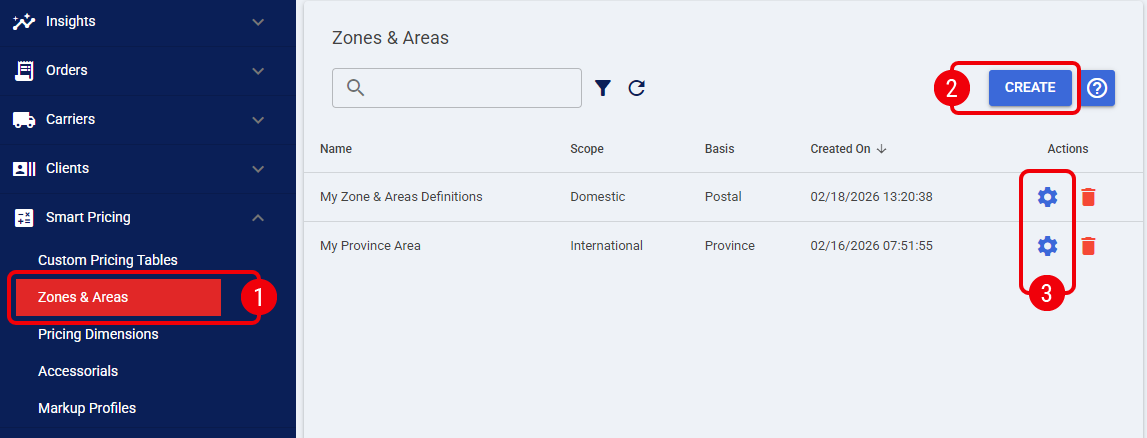
 | Click Zones & Areas from the left menu under the Smart Pricing category. |
 | Press Create, complete the required fields including its fundamental geographic Scope (e.g., Domestic or International), and save the record. |
 | Click the Edit icon on the new record to configure its mappings. |
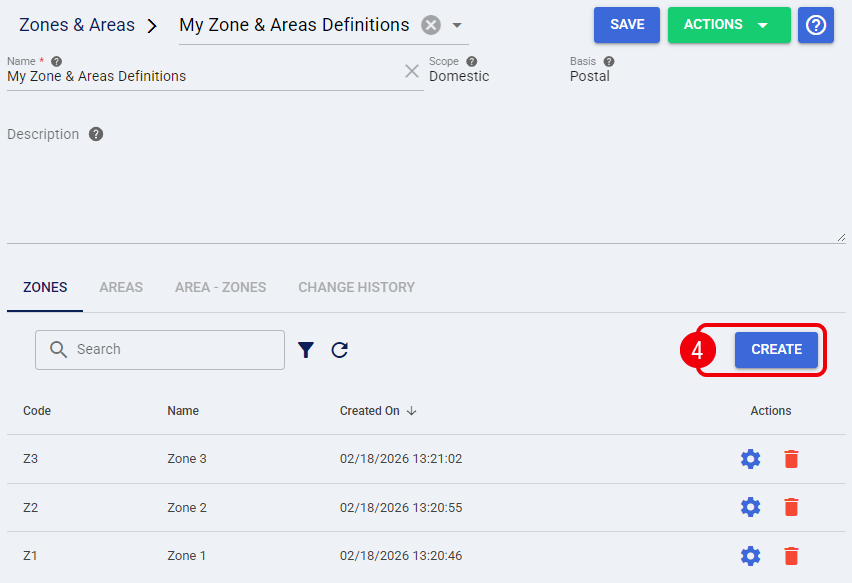
 | Under the Zones tab, press Create to define the specific routing identifiers (e.g., Zone 1, Zone 2) used by your carrier. |
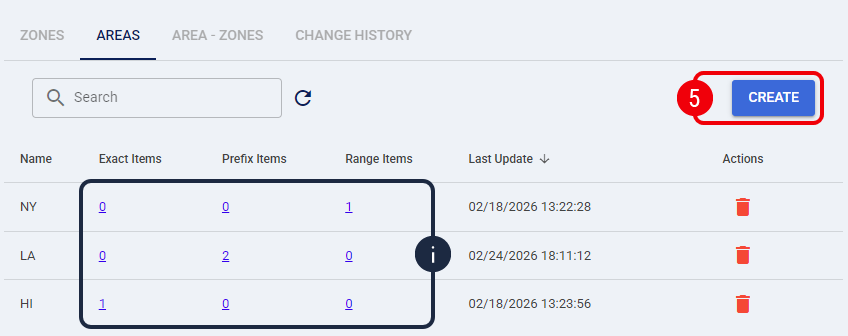
 | Under the Areas tab, press Create to add a new area. |
| To edit the physical geographies for an area, click directly on the values within the Exact Items, Prefix Items, or Range Items columns to perform an inline edit. | |
 | Under the Area - Zones tab, map the transit routes by assigning a Zone to shipments traveling from an Origin Area to a Destination Area. |
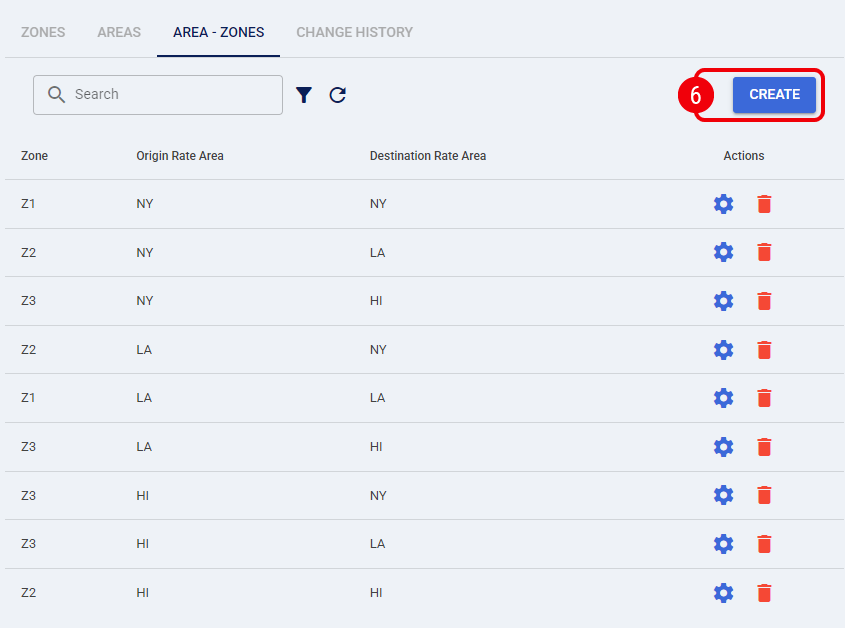
| Toggle the Is Mirrored option when creating an Area - Zone mapping to simultaneously generate the exact reverse route mapping.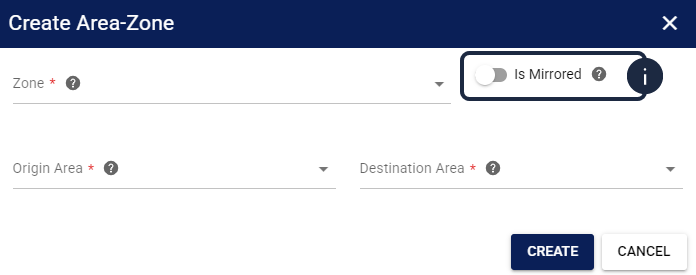 | |
| To bypass manual UI entry, you can manage geographic mappings using the Export and Import functions under the Actions menu. Importing a spreadsheet completely replaces all existing Areas and Area-Zones data.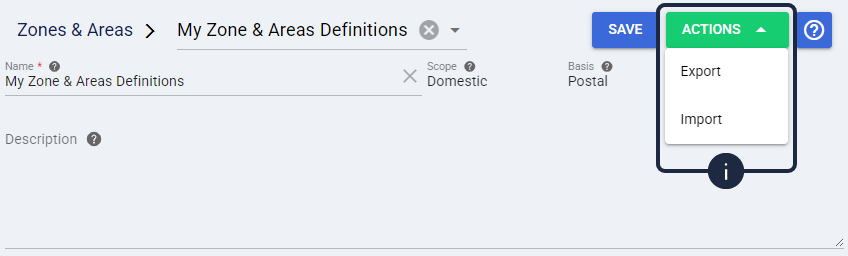 | |
Your geographic transit routes are now mapped and ready to use with a Custom Pricing Table or Markup Profile. Review your Zones, Areas, and Area - Zones before continuing with your pricing or markup setup.
Continue Your Configuration
To use your Zone & Area configuration in a Custom Pricing Table, continue with Creating Service Levels in Mastering Smart Pricing in techSHIP [Guide].
To use your configuration in a Markup Profile, continue with How to Configure and Manage Markup Profiles in techSHIP [Step-by-Step Guide].
To review recorded changes, open the Change History tab. For instructions on accessing and interpreting these records, refer to How to Review Change History Logs for Supported Entities [Step-by-Step Guide].
Was this article helpful?
That’s Great!
Thank you for your feedback
Sorry! We couldn't be helpful
Thank you for your feedback
Feedback sent
We appreciate your effort and will try to fix the article