The Techdinamics Print Client allows you to connect your local printer to your Techdinamics application, enabling you to print shipping labels and other related documents directly from your workspace.
This guide covers the requirements and steps to add a new printer profile and verify your active connection.
TABLE OF CONTENTS
Meeting the Requirements
 | The authentication process for Techdinamics printers has changed. Ensure you are using Techdinamics Print Client v1.0.0.56 or higher. For upgrade instructions, refer to How to Upgrade your Techdinamics Print Client [Step-by-Step Guide].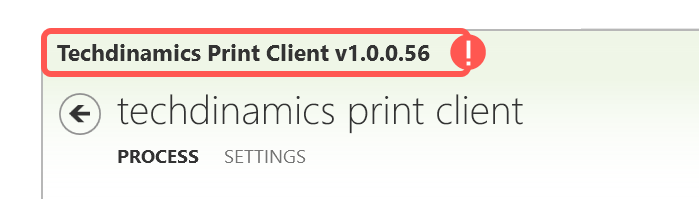 | |
| | ||
Before you begin, make sure you meet the following requirements:
- Your thermal printer must be ZPL compliant.
- You must have your API credentials ready. Depending on your platform, this consists of an API Secret and either a Connection Name (for techOMS) or an API Description (for techSHIP).
 | To generate these credentials, refer to the specific guide for your application: | |
| | ||
- Each printer must have a unique name.
- A printer setup can include:
- One thermal printer (usually 4x6, for shipping labels).
- One optional generic printer (inkjet or laser for documents like packing slips or commercial invoices).
Adding a New Printer
Once you have your credentials, you can configure the desktop client to communicate with your online application.
 | Open the Techdinamics Print Client. |
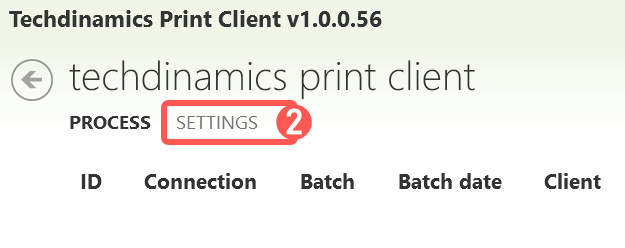
 | Access the Settings tab. |
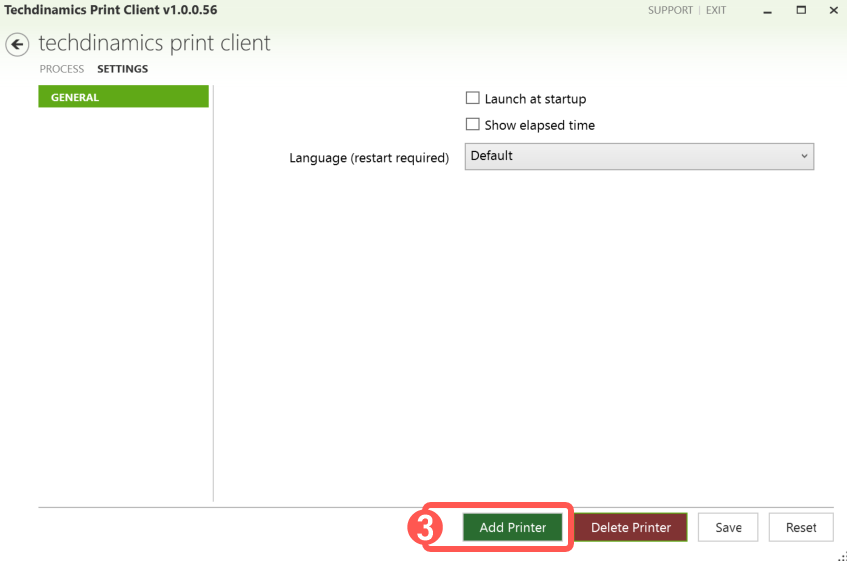
 | Click the Add Printer button. |
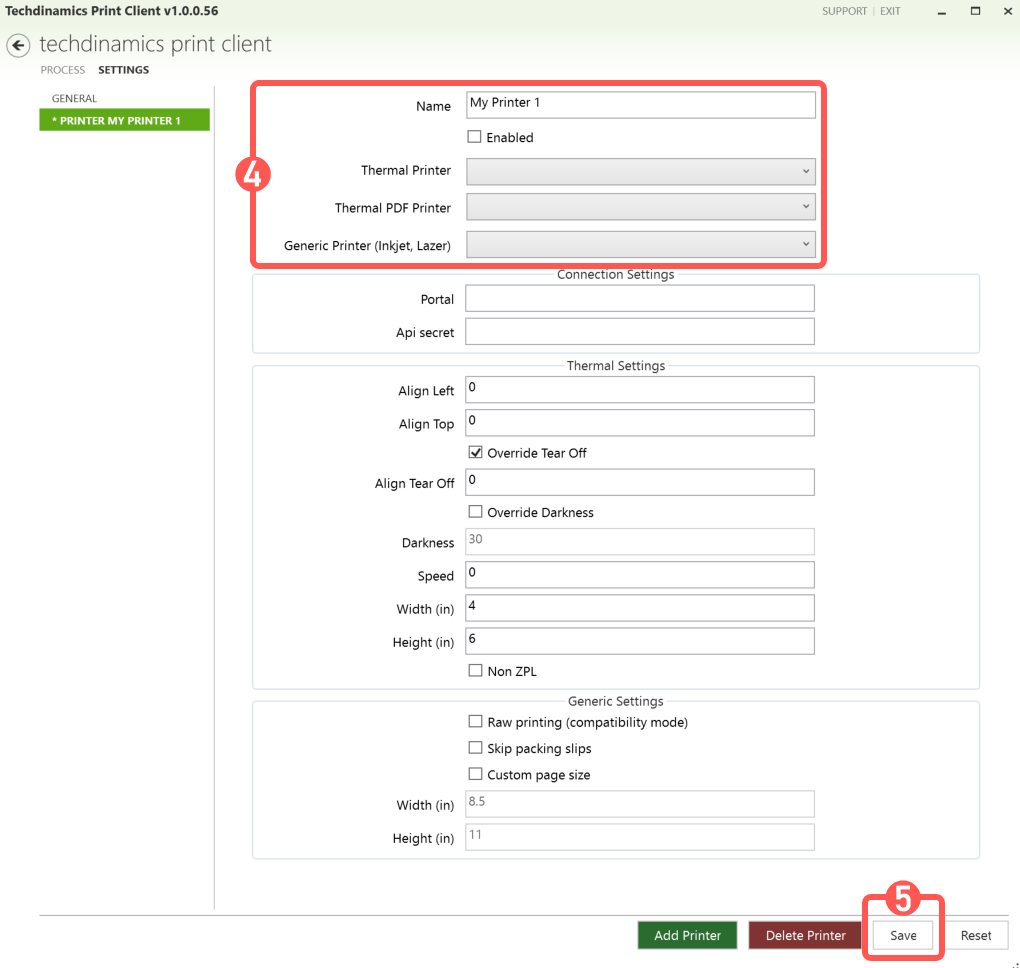
 | Set up the connection settings: |
- Name for your printer profile.
| The Name field MUST exactly match your Connection Name (if using techOMS) or your API Description (if using techSHIP). If these do not match identically, your documents will not print and the system behavior will be unpredictable. | |
| | ||
- Enabled: Check this box to enable the printer immediately. You can leave it unchecked if you plan to enable it later.
- Select your physical hardware from the Thermal Printer or Generic Printer dropdown menus, depending on the documents you intend to print.
| Additional optional settings may appear below depending on the thermal printer selected. Ensure your physical printer is plugged in or networked correctly. | |
| | ||
- Portal: Enter the domain of the product you are using. For techOMS, enter
techoms.io. For techSHIP, enter your specific location URL (e.g.,mylocation.techship.io). - API Secret: Paste the secure key you copied from your respective application.
 | Click the Save button to create the profile. |
The printer profile is now saved and stored in your desktop application.
Verifying the Printer
Once saved, you must confirm that your printer is successfully communicating with your environment.
Access your online application or refresh the page in your browser. Then, check the printer status dropdown located in the global header to ensure your new printer appears and can be selected.
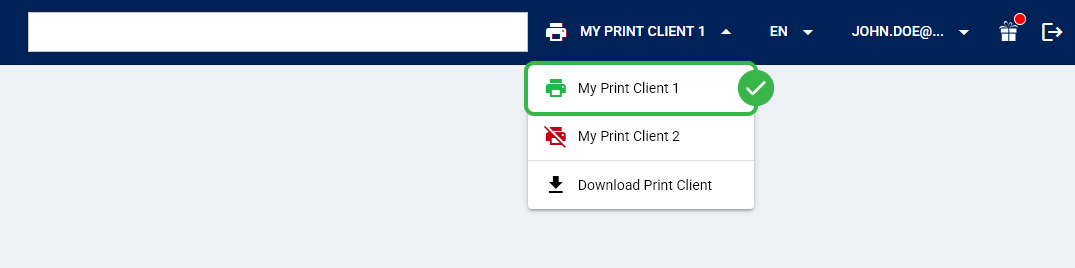
| Only Enabled printers are shown in this dropdown. If your printer is not displayed, check if its Enabled setting is checked in the print client. | |
| | ||
Your new printer profile is now verified and ready to print shipping documents.
Was this article helpful?
That’s Great!
Thank you for your feedback
Sorry! We couldn't be helpful
Thank you for your feedback
Feedback sent
We appreciate your effort and will try to fix the article