A Location represents a specific operational facility managed within your broader organizational structure in techSHIP. Effectively managing these entities allows you to tailor integrations, printing behaviors, and operational defaults to each specific site.
This guide covers how to access, navigate, and manage your facilities using the dual-access pathways and the core configuration tabs available.
 | For detailed conceptual information on how entities are grouped, refer to Understanding the techSHIP Organization Structure [Information]. | |
TABLE OF CONTENTS
Accessing and Viewing Locations
Because techSHIP centralizes administration, you can access and manage your operational facilities through two distinct UI pathways. Both pathways lead to the exact same Location Edit interface.
| Before continuing, you must ensure you have the correct administrative access. For details on the required permissions, refer to techSHIP User Permissions Structure [Information]. | |
Via the Organizations Page
This pathway displays only the child facilities assigned to a specific organizational umbrella.
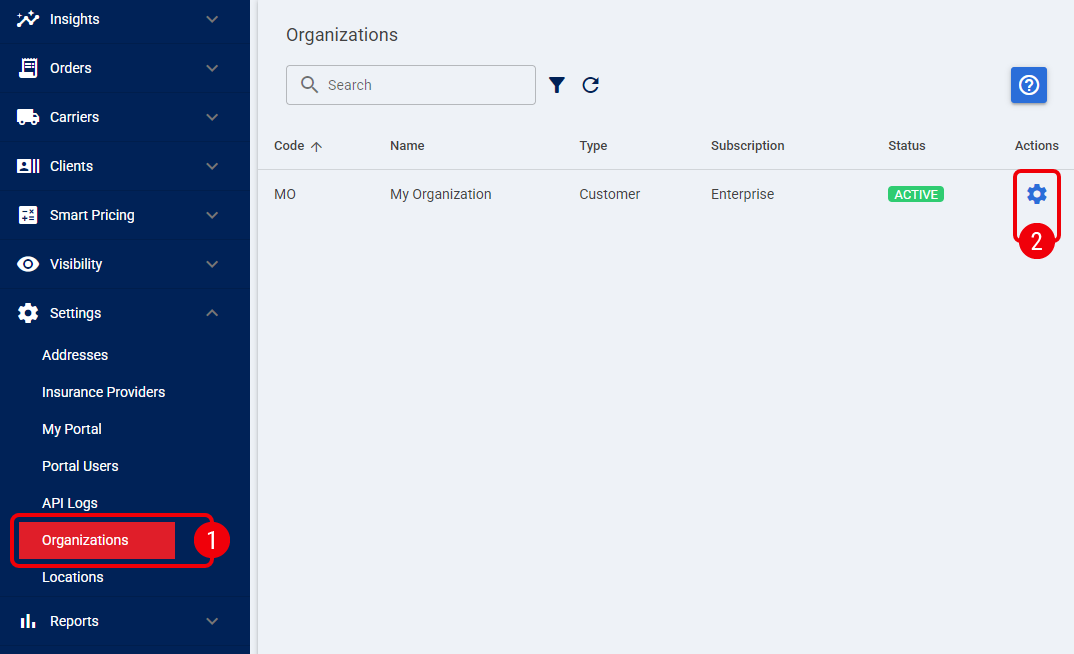
 | Navigate to Settings and select Organizations. |
 | Click on the Settings icon for your target Organization to open its configuration view. |
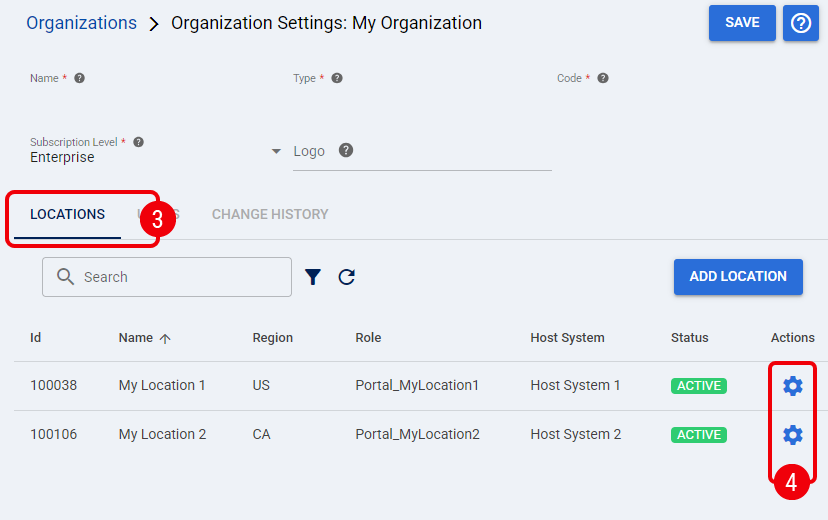
 | Click the Locations tab to view the list of associated operational facilities. |
| Because every facility requires a parent, you can only create a new Location from here. For complete instructions, see How to Create a New Location [Step-by-Step Guide]. | |
 | Click on the Settings icon for your target Location to open its edit view. |
Via the Locations Page
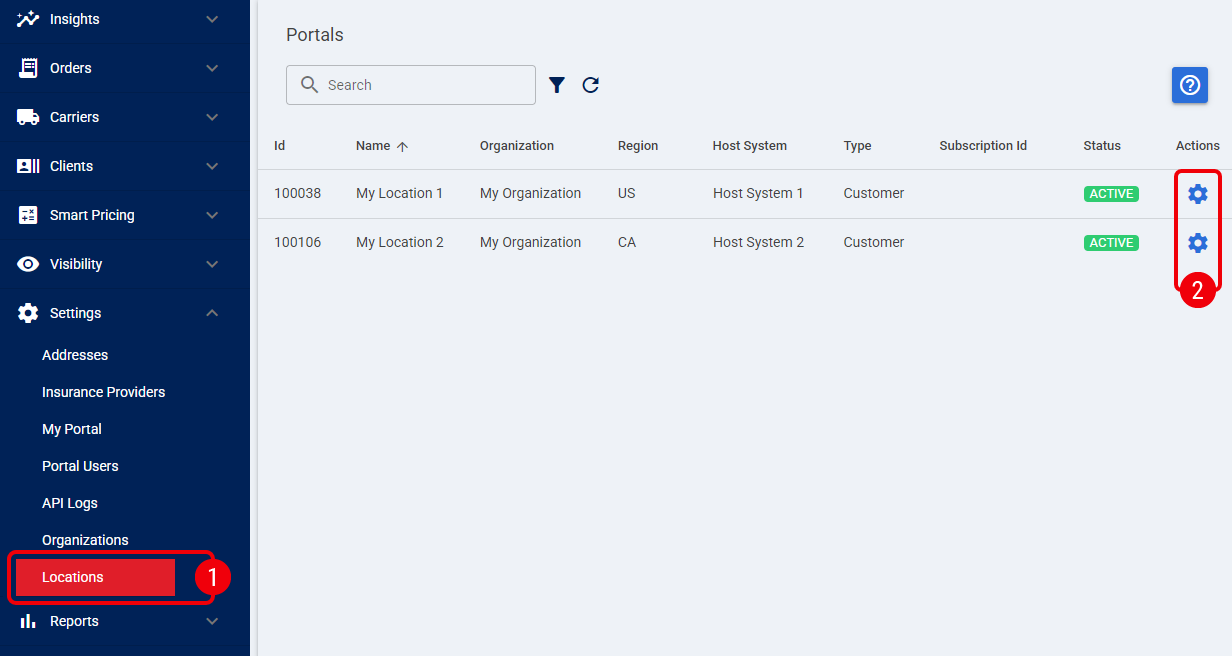
This pathway displays a comprehensive list of all operational facilities you have permission to view, regardless of their parent Organization.
| Navigate directly to Settings and select Locations. |
| Click on the Settings icon for a specific Location to open its edit view. |
Location Edit View
When you edit a facility, the configuration is organized into a top-level properties and actions section and several categorized tabs. Use this high-level overview to understand the purpose of each core area.
Main Properties
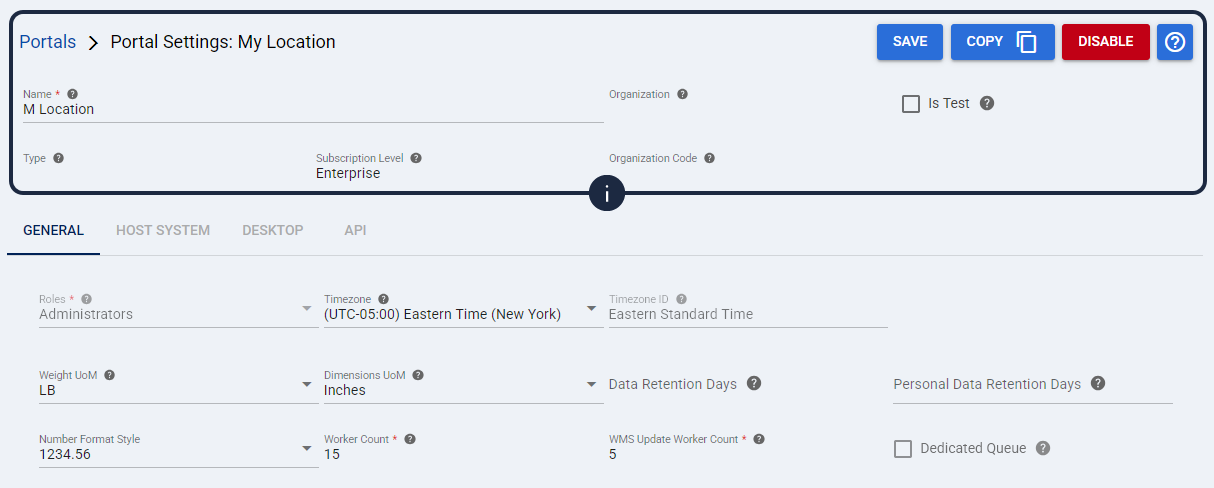
Located at the top of the page above the tabs, this section displays the fundamental identity and inherited traits of the facility.
Use this area to edit the Location Name or view read-only properties inherited from the parent Organization, such as the overarching Type, Organization Code, and active Subscription Level. You can also designate the facility as an Is Test environment and perform core actions on it:
- Copying Locations: To accelerate the rollout of similar facilities, you can duplicate an existing configuration. For instructions, see How to Copy a Location [Step-by-Step Guide].
- Toggling Status: If a facility temporarily ceases operations or goes offline, you can manually pause its processing capabilities. For instructions, see How to Disable and Enable a Location [Step-by-Step Guide].
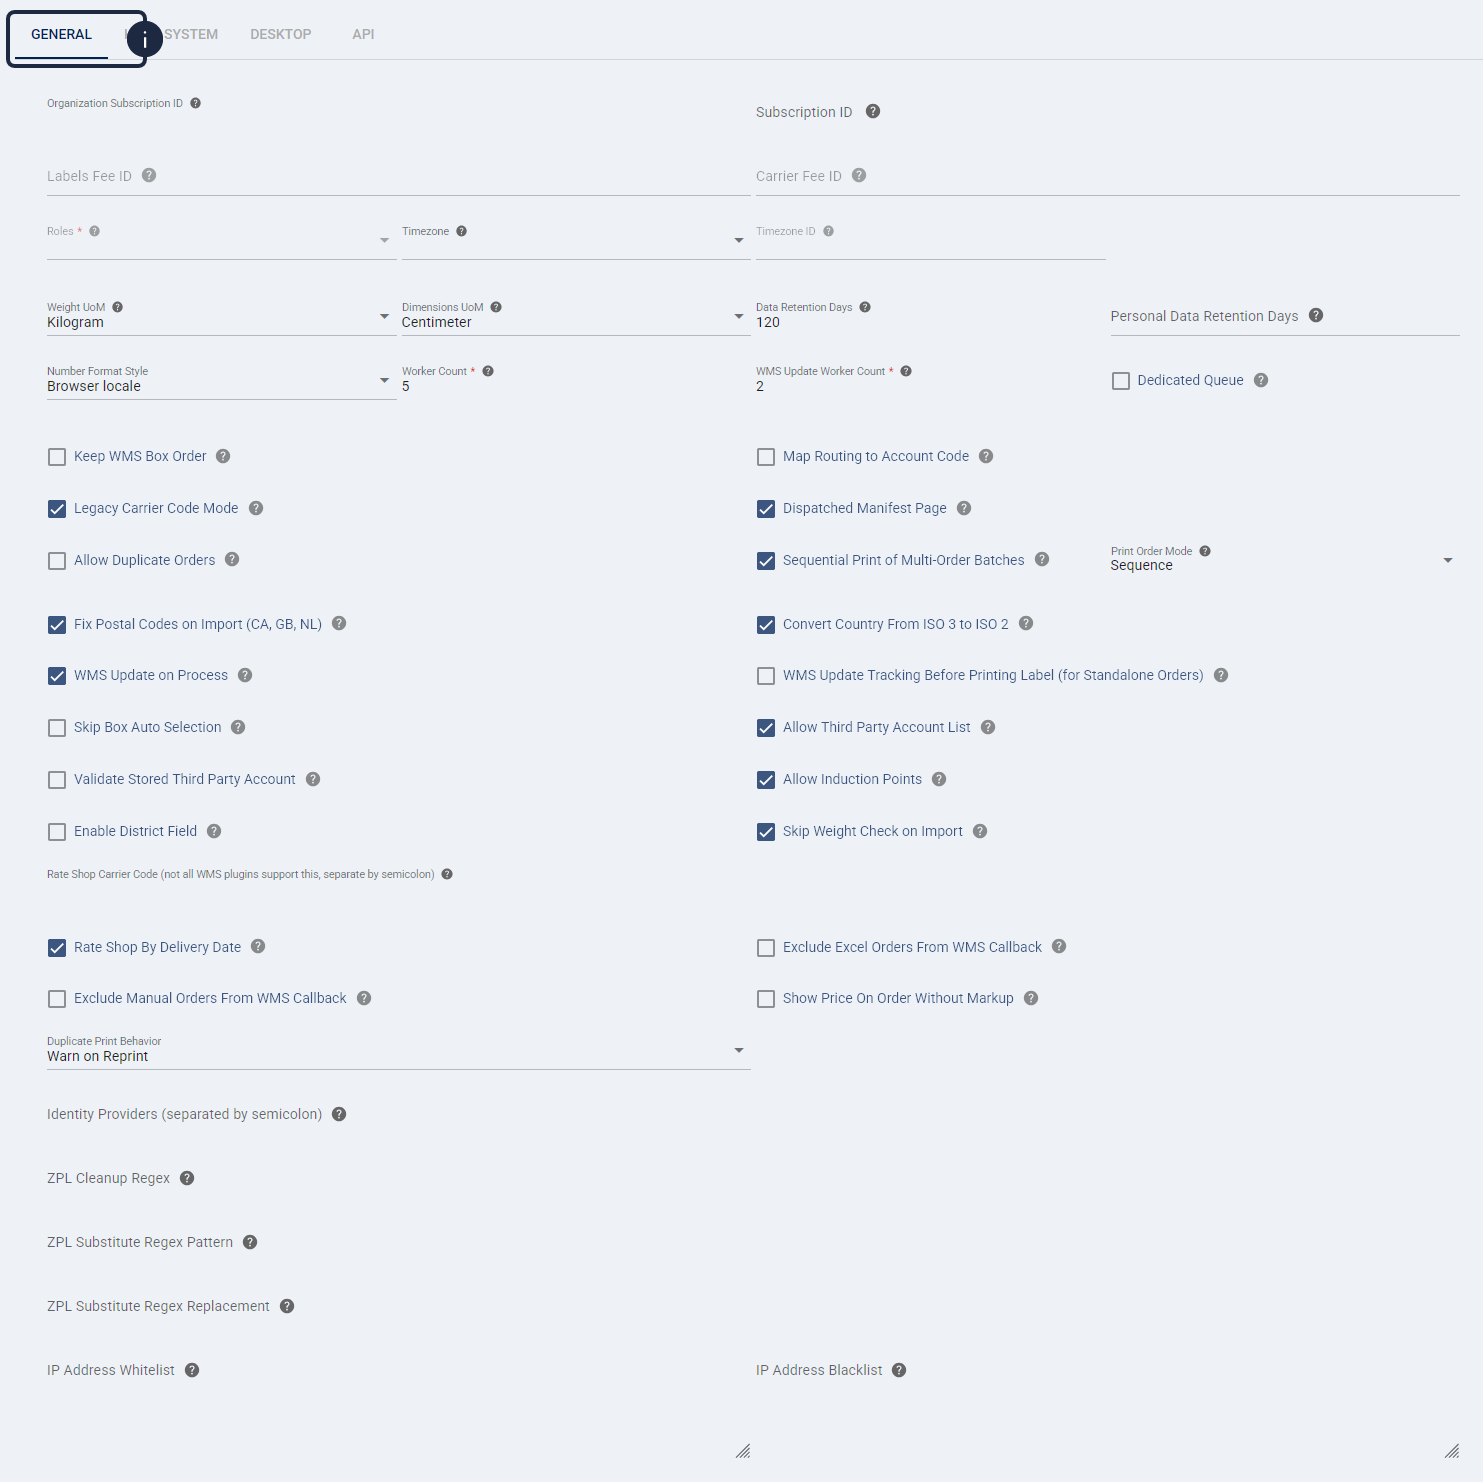
General Tab
The General tab covers the core identity and baseline configuration of the facility. Use this section to establish regional settings (such as Timezone and Units of Measure), define data retention policies, and review foundational operational defaults like automated box selection and duplicate order handling.
You can configure the:
- Reprint Policy setting to govern how the system handles attempts to reprint documents for already-printed orders.
| For detailed conceptual information and advanced configuration, refer to Understanding Reprint Policies and Print Status [Information]. | |
- Number Format setting to control how numeric values (such as Unit Prices, Weights, or Dimensions) are displayed and entered in the UI across the Location (for example, swapping commas and periods for decimal and thousands separators).
| Due to system caching, changes to the Number Format setting may take up to five minutes to propagate across the UI. | |
 | The Number Format setting applies strictly to the user interface. External integrations, Host System background imports, and API payloads are completely unaffected and will continue processing standard, unformatted universal numeric values. | |
Host System Tab
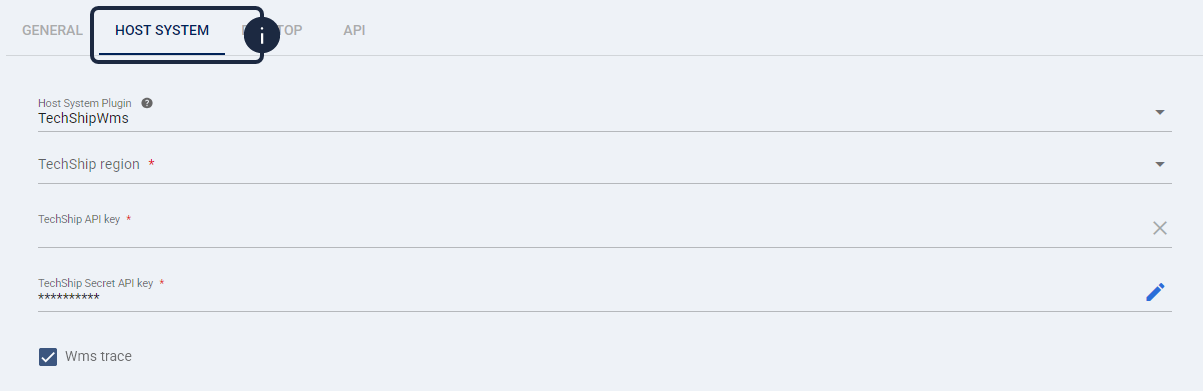
The Host System tab connects the facility to your external warehouse or order management software. Selecting a specific plugin here dynamically displays the connection fields required to establish communication between techSHIP and your external source.
For integration specifics, refer to:
- techSHIP supported WMS Plugins - Master List [Guides List]
- techSHIP supported OMS/IMS/ERP Plugins - Master List [Guides List]
Desktop Tab
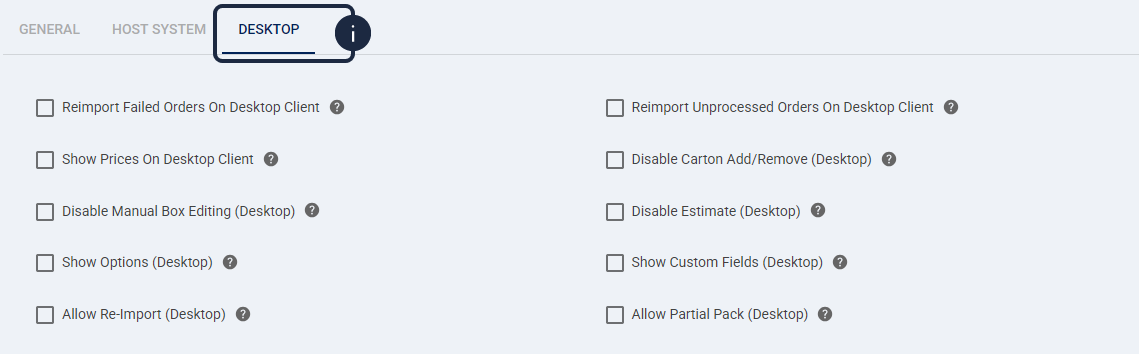
The Desktop tab configures local routing and behaviors for users operating physical stations. Use this section to determine what information is visible to the warehouse floor and to establish synchronization rules for local hardware. For related setup, refer to: How to install the TechShip Desktop Client - [Step-by-step guide].
API Tab
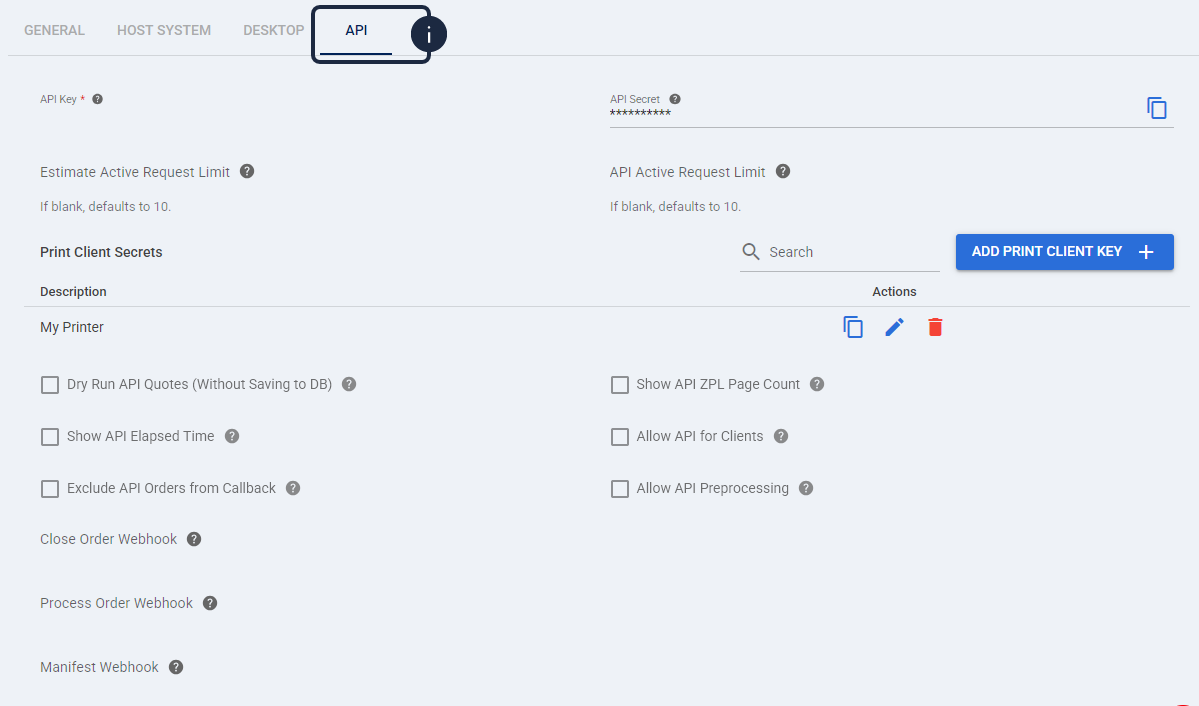
The API tab holds the authentication credentials and webhooks required for direct, programmatic interactions. Use this section to generate Print Client Secrets, set request limits, and manage callbacks that push data automatically when orders are processed or closed.
For more information, see:
- How to Install the Techdinamics Print Client [Step-by-Step Guide]
- How to Add a New Printer Profile on Techdinamics Print Client [Step-by-Step Guide]
- How to Get an API Secret for the Techdinamics Print Client [Step-by-Step Guide]
- Getting started using techSHIP API [Information]
Was this article helpful?
That’s Great!
Thank you for your feedback
Sorry! We couldn't be helpful
Thank you for your feedback
Feedback sent
We appreciate your effort and will try to fix the article