The Print Clients tab allows you to generate API secrets to securely connect the Techdinamics Print Client desktop application to your online workspace. Establishing this connection enables you to print shipping documents directly from your fulfillment workflow.
This guide covers how to create, edit, delete, and copy connection keys for your print clients, as well as how to activate your selected printer using the global header switcher.
TABLE OF CONTENTS
Prerequisites
Before configuring your connection, ensure you have completed the following requirements:
- System Context:
The print client is designed specifically to print shipping documents, which requires an active integration with techSHIP. For more information on this workflow, refer to Understanding the techOMS Packing Module [Information].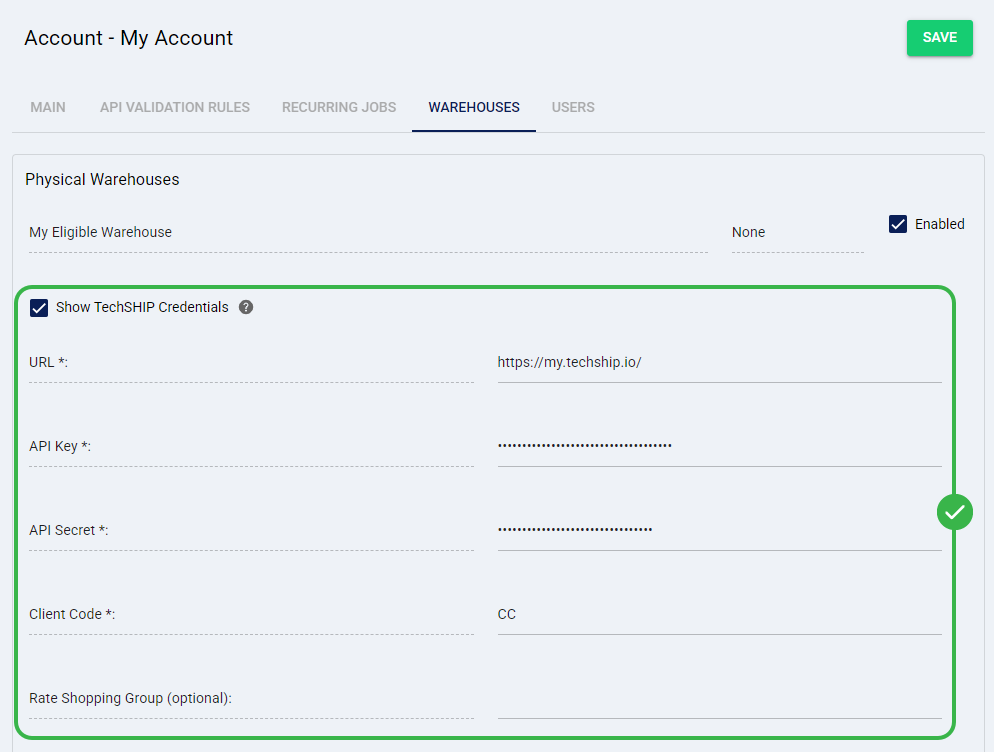
- Desktop Application:
You must have the desktop application installed on your computer. If you have not yet installed it, you can download it directly by clicking the Download Print Client link located at the bottom of the Print Client dropdown menu in the techOMS global header. For installation instructions, refer to How to install the Techdinamics Print Client [Step-by-step guide].
Managing Print Client Connections
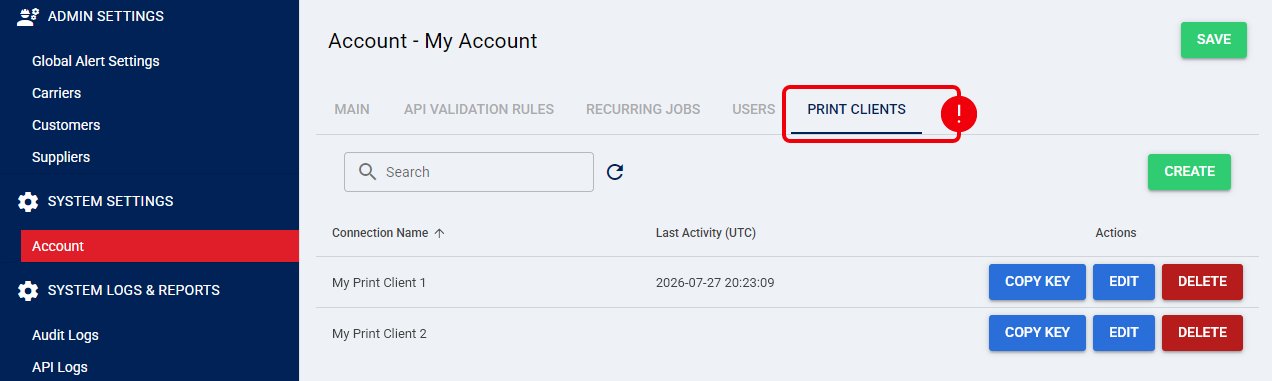
Navigate to your account settings as described in How to Edit an Account [Step-by-Step Guide], and click on the Print Clients tab to begin. Within this tab, you can manage all authorized connections for your account to ensure your hardware communicates seamlessly with techOMS.
Creating a Connection
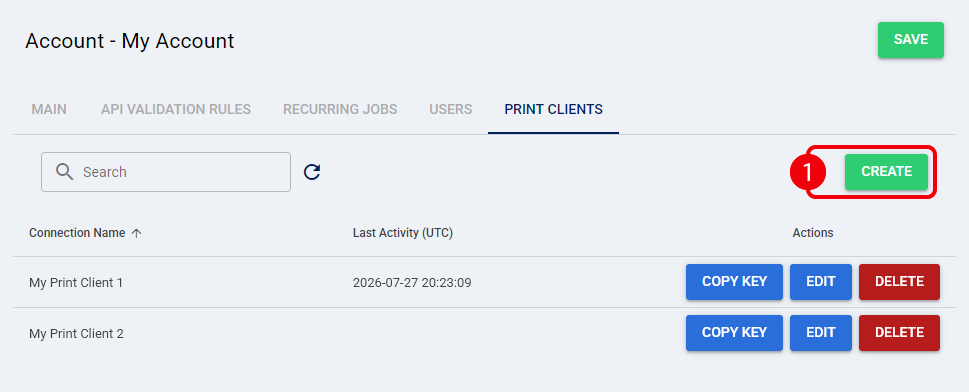
To authorize a new physical printer, you must create a dedicated connection record.
 | Click the Create button to add a new print client. |
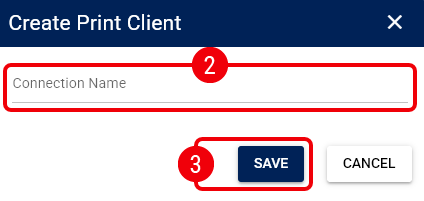
 | Enter a descriptive Connection Name for your printer. |
 | Save your changes to generate the connection profile. |
Copying the API Secret
Once your connection is created, the system generates a secure API secret that the desktop application requires to authenticate with techOMS. To retrieve this credential, locate your newly created printer in the data grid and click the Copy Key action button in that row.
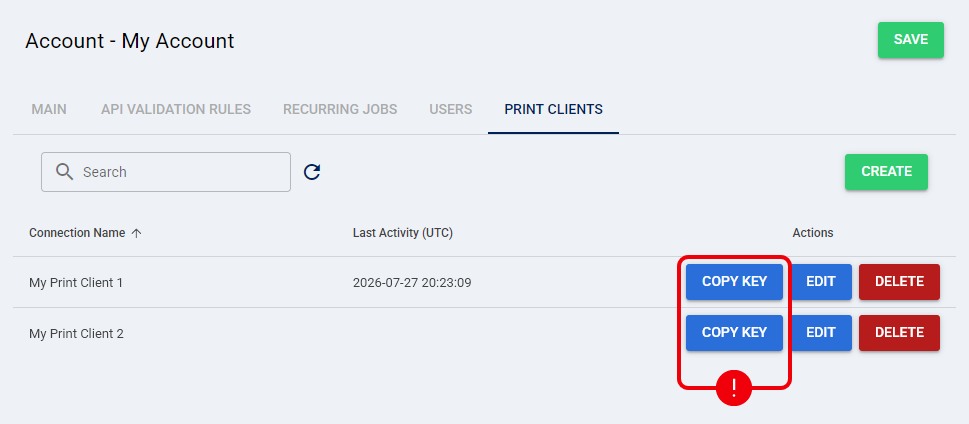
With both the exact copied Connection Name and API Secret, refer to How to add a new Printer Profile on Techdinamics Print Client [Step-by-step guide] to continue with your setup.
 | If any of these values do not match identically, your documents will not print and the system behavior will be unpredictable. | |
| | ||
Editing and Deleting Connections
You can easily modify existing configurations to keep your infrastructure up to date.
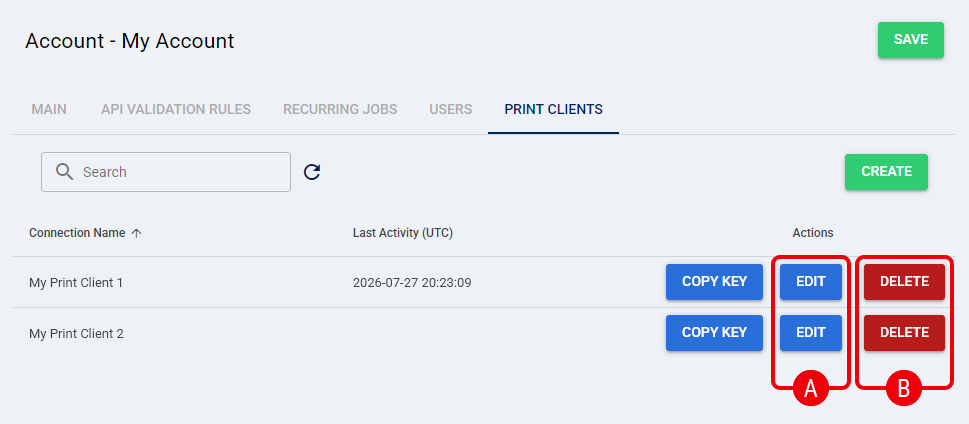
 | Edit: Click the edit icon next to a connection to update its Connection Name. |
 | Delete: Click the delete icon to permanently remove the authorization for a specific printer. Once deleted, the corresponding desktop application will immediately lose access to techOMS. |
Activating Your Printer
After configuring the connection in your account settings and setting up the desktop application, you must actively select the printer you want to use during your current session.
 | Refresh your browser page to ensure your newly created connection is available in the menu. | |
| | ||
To activate your destination, click the Print Client dropdown menu located in the top global header and select your desired printer from the list.

The active print client is now set, and techOMS will route all generated shipping documents directly to your selected hardware when using the packing module. For complete procedural instructions on building packages and printing these documents, refer to How to Pack Shipments [Step-by-Step Guide].
Was this article helpful?
That’s Great!
Thank you for your feedback
Sorry! We couldn't be helpful
Thank you for your feedback
Feedback sent
We appreciate your effort and will try to fix the article