You can edit Receipts within techOMS, review their associated information, and move them through the applicable stages. This guide explains how you can edit Receipt details, review Receipt lines and references, and save or advance the Receipt.
 | Make sure that you are operating under the correct Account before you proceed.
| |

To edit a Receipt, follow these steps:
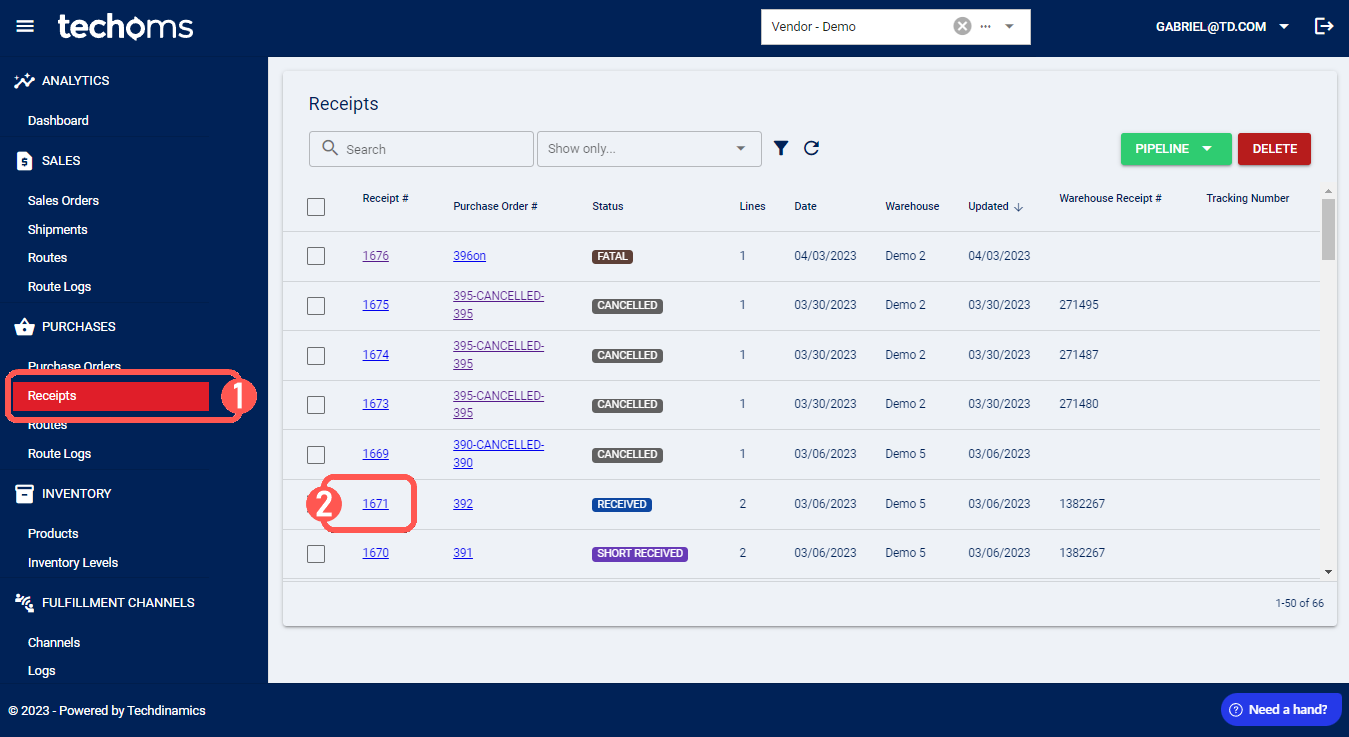
 | Click Receipts under Purchases. |
 | Click the Receipt to deploy the fields for management. |
 | Edit the order-level fields as applicable: |
- Reference #: Allows you to review or update the Receipt reference number when applicable.
- Tracking Number: Allows you to enter the Carrier tracking number.
- Carrier: Allows you to select the Carrier used for the Receipt.
- Service: Allows you to select the Service available for the selected Carrier.
- Order Number: Displays the system-assigned number, which you can modify when applicable.
- Warehouse Receipt Number: Allows you to manage the corresponding warehouse Receipt number.
- Purchase Order Number: Allows you to review or update the associated Purchase Order number.
- Waybill: Allows you to enter the waybill number.
 | You can review, but not add or edit, the Receipt line information. |
| Lot and serial numbers are available for supported fulfillment channels, but limitations may apply. For details about your specific channel restrictions, refer to the applicable fulfillment channel setup article: techOMS Fulfillment Channels - Master List [Guides List]. To learn more about this functionality, refer to Understanding Lot and Serial Numbers Synchronization [Information]. | |
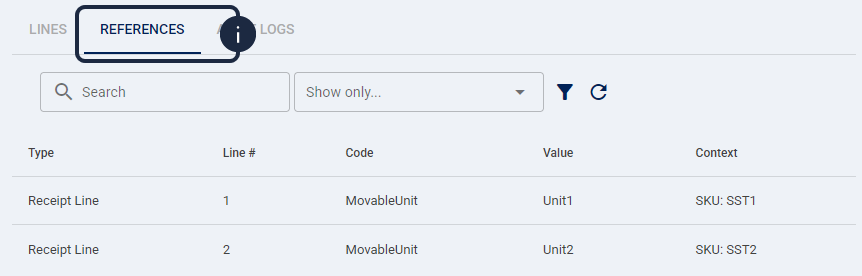
| Select References to review read-only references associated with the Receipt or a Receipt Line:
| |
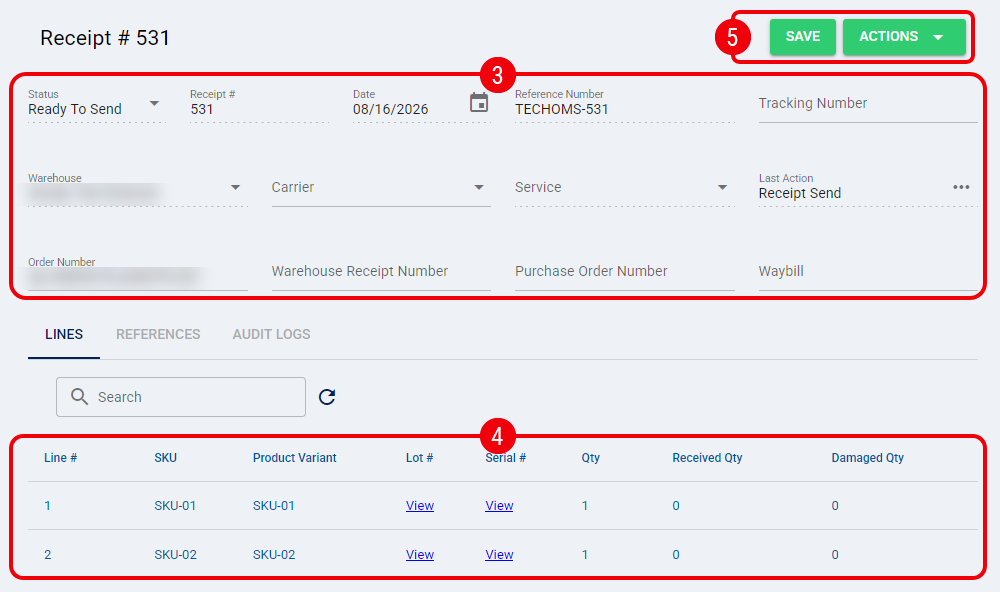
 | Save the Receipt through whichever action is applicable to your workflow: |
- Save: Saves the Receipt in Draft mode.
- Actions:
- Send: Sends the Receipt to the assigned Fulfillment Channel.
- Receive.
- Cancel: Allows you to cancel the approved Receipt.
- Confirm Cancel: Allows you to cancel the approved Receipt in both the Fulfillment Channel and techOMS.
| Confirm Cancel is effective only when the fulfillment channel supports Receipt cancellation. For supported functionality, refer to techOMS Fulfillment Channels - Master List [Guides List]. | |
After you complete the applicable Receipt actions, your changes are applied according to the selected workflow. You can then review the References tab when you need to inspect reference data associated with that Receipt.
Was this article helpful?
That’s Great!
Thank you for your feedback
Sorry! We couldn't be helpful
Thank you for your feedback
Feedback sent
We appreciate your effort and will try to fix the article