When shipping international orders via FedEx and you choose to use Electronic Trade Documents (ETD) instead of physically printing customs and trade documents, you need to upload the ETD images required by FedEx and then assign them to the Billing Account you will use for shipping.
This process consists of 2 parts:
- First, upload the images you will use for Letter Head Image and Electronic Signature Image in the FedEx Baseline Account.
- Then, assign the uploaded images to the Billing Account you will use for shipping.
Repeat these steps as needed to cover all the images and accounts you will use.
TABLE OF CONTENTS
Upload the Images
 | Go to My Carriers from the left menu under the Carriers category and select Fedex REST Settings, click on Settings to open and edit the FedEx REST Baseline Account you will use for shipping. |
 | Select the Carrier tab. |
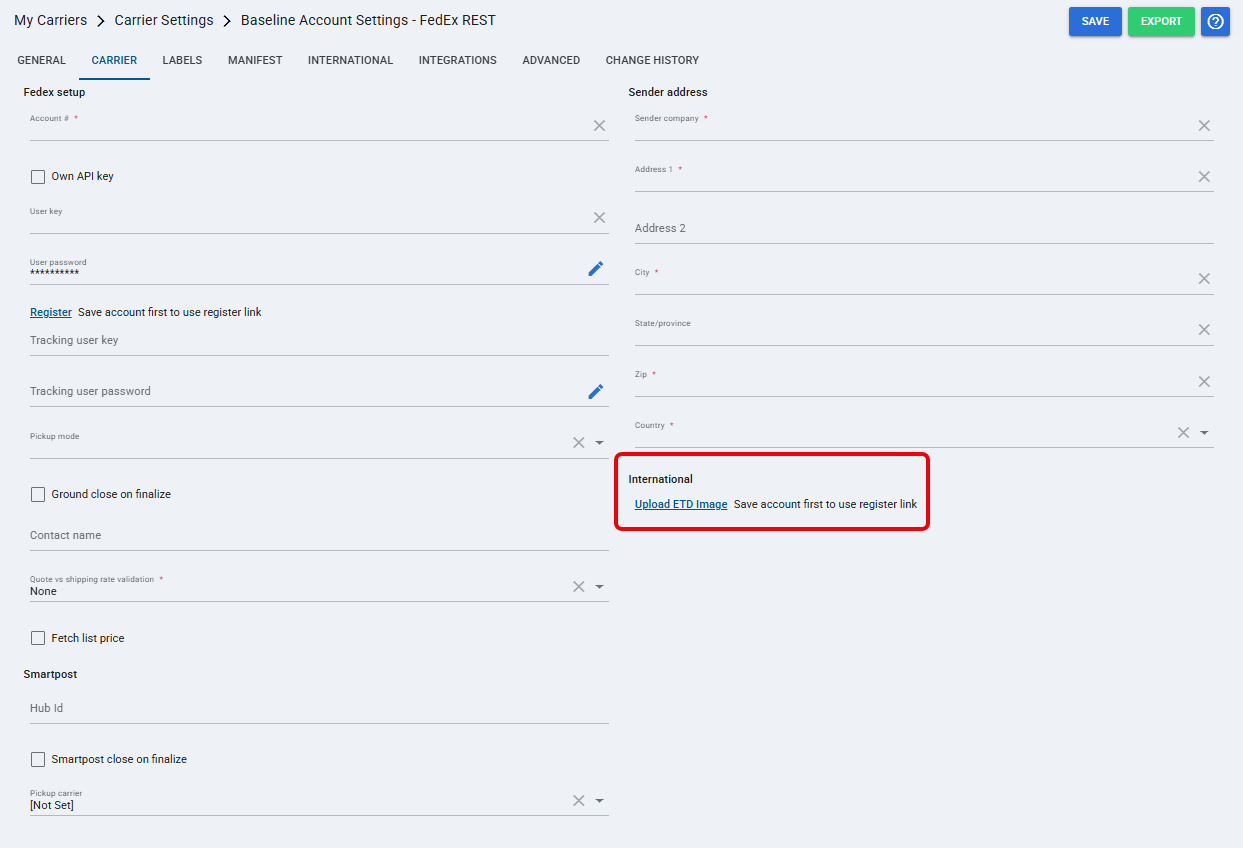
 | In the International section, click Upload ETD Image. |
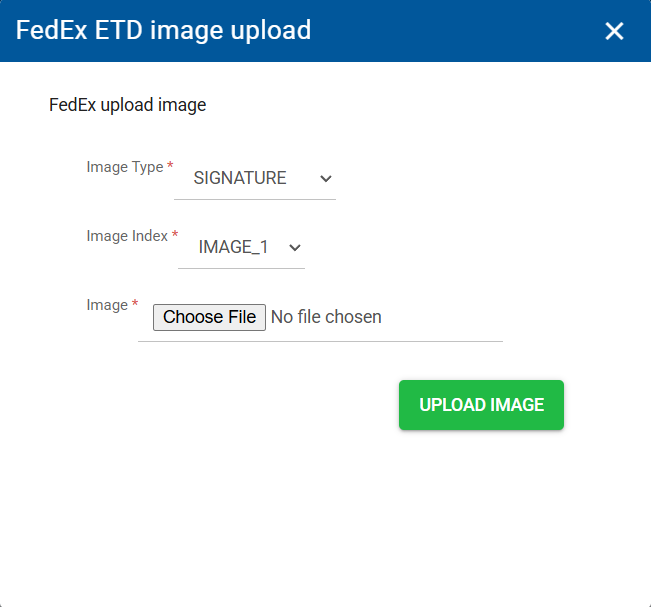
 | Select the Image Type you want to upload. |
 | Select the Image Index you want to use. |
 | Click Choose File, locate the file, and select it. |
 | Click Upload Image to complete the process. |
Assign the Images for Usage to the Account
| Click Clients from the left menu under the Clients section. |
| Find the client related to the order and click on Settings. |
| Under Accounts find the Billing Account you will use for international shipping, then click the Edit button. |
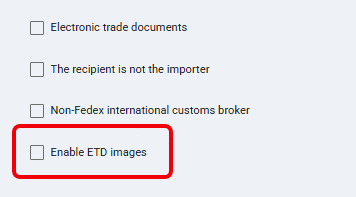
| Select the Carrier tab and check the Enable ETD Images check box. |
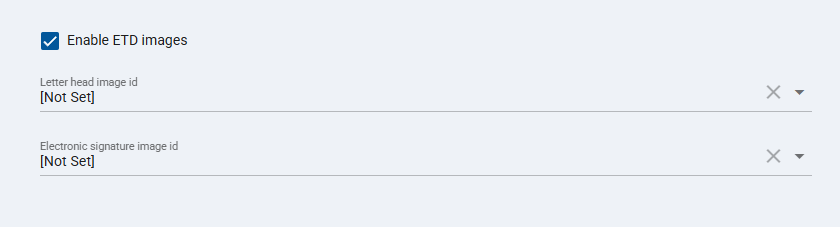
| Select the Image ID you want to use for each applicable ETD image field according to the images uploaded in the previous process. |
| Press Save to apply the changes. |
Was this article helpful?
That’s Great!
Thank you for your feedback
Sorry! We couldn't be helpful
Thank you for your feedback
Feedback sent
We appreciate your effort and will try to fix the article