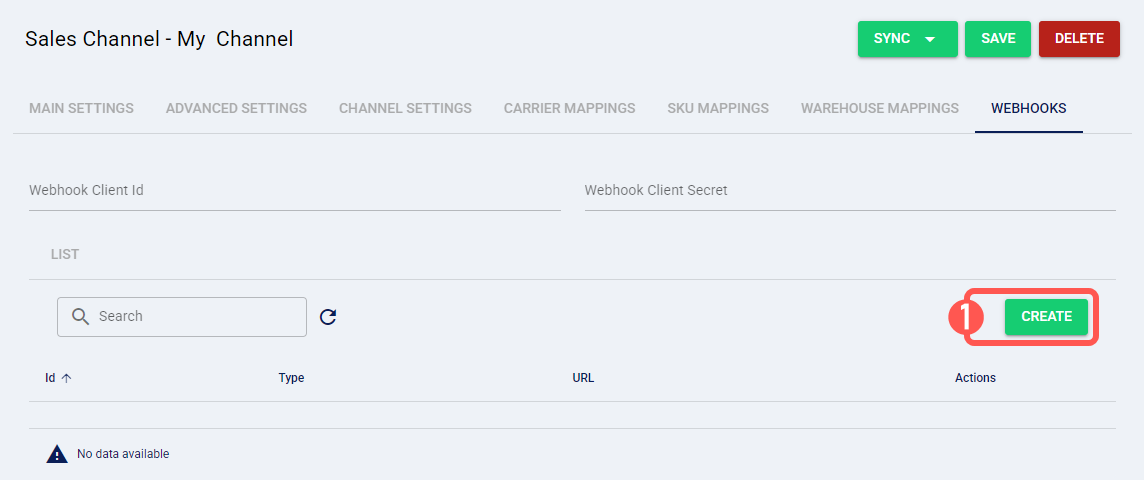
When connecting a Sales or Fulfillment Channel, you can set up webhooks for information exchange between systems.
 NOTE: This feature applies only to supported channels. For details, refer to:
This article is divided into the following sections:
- Accessing the Webhooks Tab
- Choosing Webhook Usage
- Manual Configuration (Using Channel Credentials)
- Automatic Configuration (Using techOMS-Generated Webhooks)
- Saving Changes
I. ACCESSING THE WEBHOOKS TAB
 NOTE: Make sure that you are operating at the right Vendor/Warehouse beforehand.
 NOTE: This procedure requires the channel's Mode to be set to Webhooks in the Main Settings tab. For more information, see How to configure Automations for Sales/Fulfillment channels [Step-by-step guide].
To access the webhook settings:
1. Click Channels from the left menu under the Sales or Fulfillment Channels section according to your case.
2. Click the name of your channel.

3. Open the Webhooks tab.

Continue to the next section to choose your webhook setup.
II. CHOOSING WEBHOOK USAGE
You can configure one of two webhook modes:
- Manually created in the channel (for customization purposes), or
- Automatically generated by techOMS (for fulfillment orders).
 WARNING: For Shopify channels, do not configure both modes simultaneously. Doing so may lead to unexpected behavior.
i. Manual Configuration (Using Channel Credentials)
Enter the webhook credentials provided by your channel:
- Webhook Client Id
- Webhook Client Secret
 NOTE: Some external channels, like Shopify, may require specific subscription plans (e.g., Shopify or higher) to use webhooks or transmit Personally Identifiable Information (PII).
 WARNING: Credentials are sensitive and should be handled securely. Avoid sharing or exposing them.

ii. Automatic Configuration (Using techOMS-Generated Webhooks)
1. Press Create.

2. Select the connection type from the Type dropdown.
techOMS will automatically generate the required ID and URL.
3. Press Save.

III. SAVING CHANGES
Once configured, click Save to apply your changes.

Was this article helpful?
That’s Great!
Thank you for your feedback
Sorry! We couldn't be helpful
Thank you for your feedback
Feedback sent
We appreciate your effort and will try to fix the article