To connect Walmart, first create the Sales Channel connection, and then set up its parameters.
Once the connection is established between the channel and techOMS, you can use its supported features as listed in: techOMS Sales Channels - Master List [Guides List].
This article is divided into the following sections:
- Onboarding Requirements
- Create the Sales Channel
- Configure Additional Parameters
- Specific Behaviors
 NOTE : Make sure that you are operating at the correct Account beforehand.
I. ONBOARDING REQUIREMENTS
- A Walmart Marketplace seller account.
II. CREATE THE SALES CHANNEL
To create a Walmart Sales Channel, follow: How to Create a Sales Channel [Step-by-step guide].
III. CONFIGURE ADDITIONAL PARAMETERS
To configure additional parameters:
- Click Channels from the left menu under the Sales Channels section.
- Click on the created channel's name.
- Use the highlighted areas in the screenshot below and configure the required settings.
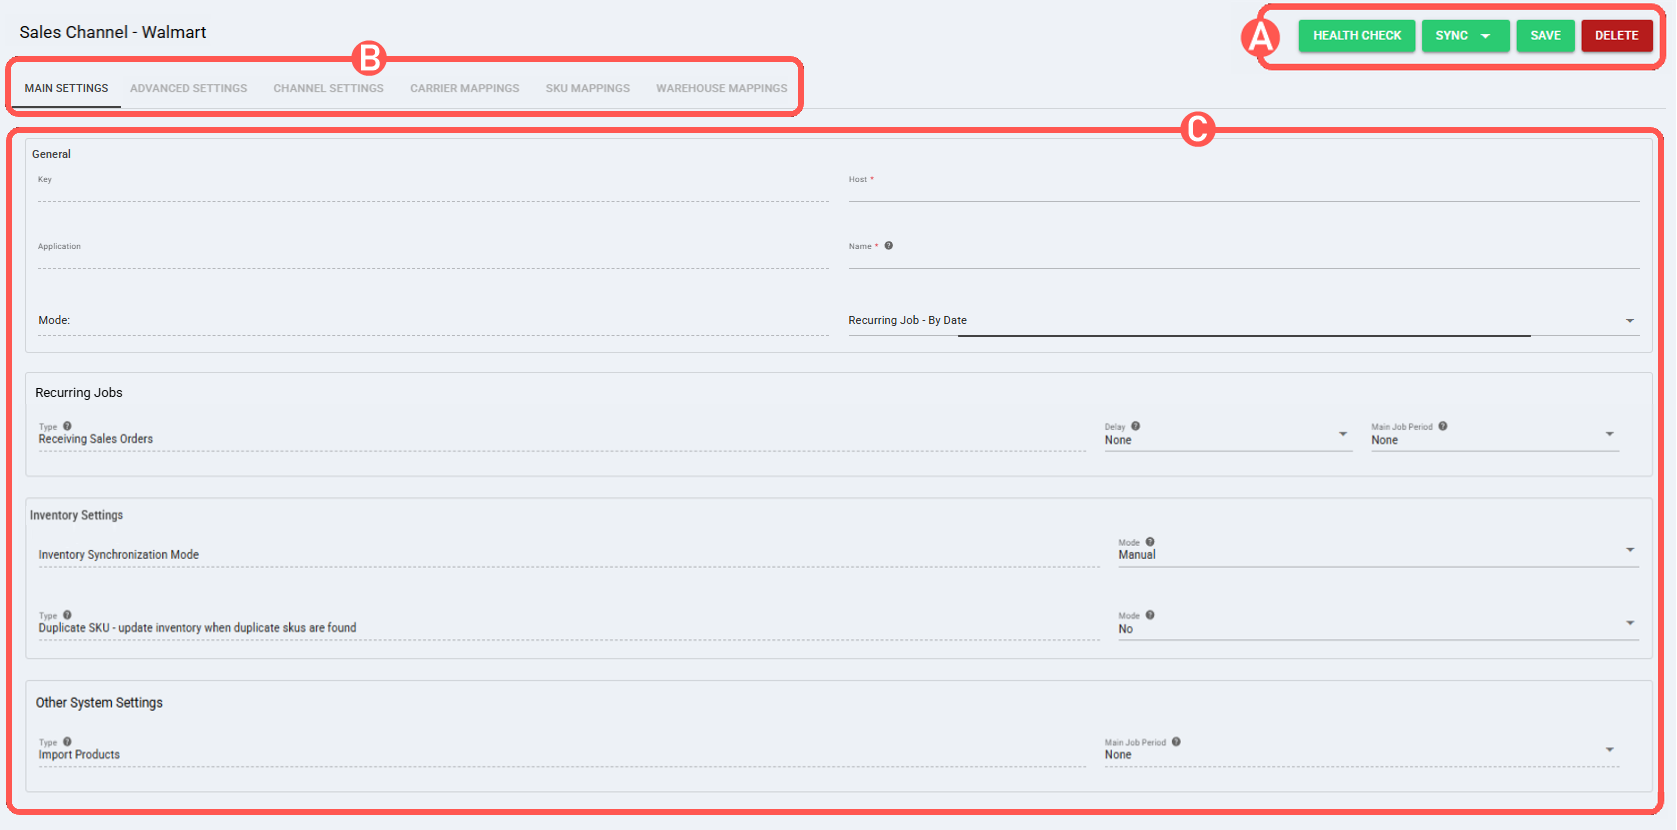
SECTIONS
A) QUICK ACTIONS lets you perform additional actions:
- Health Check: Verifies if the connection is active or not.
- Sync: Enables manual synchronization as detailed in How to Synchronize data through a Sales Channel [Step-by-step guide].
Sync Options:- Receive Sales Orders From Channel
- Send Inventory Levels To Channel
- Import Products From Channel
- Save: Saves and commits changes.
- Delete: Deletes the channel connection.
B) VIEW SELECTION allows you to navigate the different tabs:
- Main settings (default): Configures general and automation behavior using: Main Settings of a Beta Sales Channel [Information].
- Advanced settings: Configures additional system/privacy settings using: Advanced Settings of a Sales Channel [Guide].
- Channel settings: Sets the channel integration parameters listed below.
 NOTE: The fields displayed in this section are dynamic. Based on your previous selections and the inherent capabilities of the channel, certain fields may be hidden, disabled, or cascaded.
Channel Settings (Fields)
- Api Url: Enter the Walmart API URL.
- Seller Id: Identifies the Walmart Marketplace seller account associated with the connection.
- Refresh Token: The OAuth 2.0 refresh token used to obtain new access tokens for the Walmart connection.
- Download Orders with the following Order Status (select multiple items): Select one or more order statuses to determine which Walmart orders to download.
- Product life cycle status: Select one or more product lifecycle statuses. Available values are ACTIVE, ARCHIVED, RETIRED, and ALL. Default value: ACTIVE. NOTE: During product synchronization, Pull Products only imports products into techOMS that match the selected Product life cycle status.
- Product published status: Select one or more product publication statuses. Available values are PUBLISHED, UNPUBLISHED, and ALL. Default value: PUBLISHED. NOTE: During product synchronization, Pull Products only imports products into techOMS that match the selected Product published status.
- Market: Select the Walmart market for the connection. Available values are US, CA, MX, and CL. Default value: US.
- Throughput: Select the throughput value for the Walmart Sales Channel.
- Carrier Mappings: Sets Carrier name mappings as detailed in How to map Carriers in a Sales Channel [Step-by-step guide].
- SKU Mappings: Reviews and sets SKU mappings as detailed in How to map SKUs in a Sales Channel [Step-by-step guide].
- Warehouse Mappings: Allows defining, mapping, and linking techOMS warehouse entities to external warehouse entities as described in How to manage Warehouse Mappings [Step-by-step guide].
- Webhooks: Sets webhook connections as detailed in How to configure Automations for Sales/Fulfillment channels [Step-by-step guide].
 WARNING: Webhooks are only supported for the US market.
C) CONTENT VIEW displays and/or allows editing of the settings in the "View Selection" section.
WARNING: Remember to press Save to commit the changes made in this section.IV. SPECIFIC BEHAVIORS
Sales order location filtering: When a Walmart Sales Order includes a ShipNode, techOMS uses the value to filter the order by destination warehouse. If ShipNode is not provided, the order is imported without location filtering.
Was this article helpful?
That’s Great!
Thank you for your feedback
Sorry! We couldn't be helpful
Thank you for your feedback
Feedback sent
We appreciate your effort and will try to fix the article